 |
| pic 1 |
 |
| pic 2 |
 |
| pic 3 |
 |
| pic 4 |
 |
| pic 5 |
 |
| pic 6 |
 |
| pic 7 |
 |
| pic 8 |
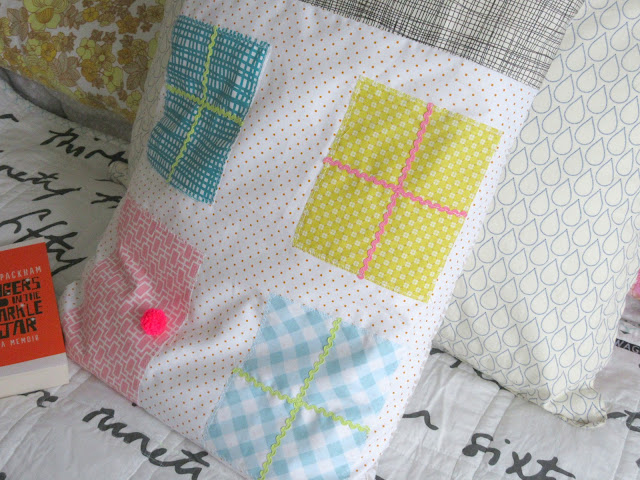
ok so here is the last DIY for craft camp week..a little house pillow for reading in bed.It would make a great addition to a reading corner or den or looks great on a bed! (and yes I did buy that book because I liked the cover but I'm hoping it lives up to it's looks)
you will need sewing skills for this so not one just for little people but...they can choose the colours/fabrics and cut out and design/plan the windows etc and of course enjoy it once it is made.
you will need
- a pillow (40 x 70cm) this was the size I had, so the fabric measurements are relating to this if your pillow is bigger or smaller you will need to measure it and adjust the measurements accordingly...it won't matter though if the cover is a little small or big...pillows are quite forgiving
- fabric scraps x 4 for windows etc
- ric rac trim
- pom pom/button (optional)
- scissors
- pins
- iron/board
-sewing machine/thread
- 1 piece of fabric for main front part 46cm x42cm
- 1 piece of fabric for roof 28cm x 42cm
- 1 piece of fabric for large back panel 60cm x 42cm
- 1 piece of fabric for small back panel 34cm x 42cm
- cut out all the pieces of fabric and lay the front pieces on a table, cut out three rectangles for windows and one longer rectangle for the door (pic 1)
- take the roof piece and the main piece and place right sides together along the width of the fabric. -Sew a 1cm seam along this edge to join the two pieces together (pic 2) press flat
- pin the windows/door in place and cut the ric rac to fit inside the windows (pic 3/4) stitch them all down. You can use a zig zag stitch here to keep the raw edges from fraying as much.
- take one of the back panels,along one of the 42cm widths fold the edge over twice and stitch down to make a hem, repeat with the other back panel. (pic 5) press flat.
- place the house front piece right side facing upwards on a table lay the larger back panel on top right side down and then place the smaller panel right side down on the remaining part, they should overlap approx 10 - 12cm (pic 6) pin in place and sew a 1cm hem all around the edges to make the cover.(pic 7) I overlocked the edges to stop them fraying but you can zig zag or use pinking shears to do the same job. Press all the seams and turn the right way out.
- at this point I stitched on a pom pom for a door handle but you could use a button or a circle of fabric/felt.
- Put the pillow inside
note* if you are struggling with my instructions on the envelope back part of this tutorial have a look at this
Other ideas... you can make this in any size or shape, add more windows, do a version of your house or apartment or make a favourite building. You could make the windows in to pockets by not sewing the top edge down, if you lay the pillow the other way you could do a really cool retro bungalow. You could add curtains and more detail or keep it really simple. If your sewing skills aren't up to this you could just customise a ready made pillowcase and glue the windows on.
Remember all these projects are just for fun and don't have to be perfect, do your own thing and enjoy...share your pics over on instagram if you make any.
Hope you have enjoyed craft camp, I've loved making these projects, once again apologies for any mistakes, these were all thought up, made, photographed and written up in a few days and in a hurry between my work and family jobs but hopefully they have inspired some crafty adventures this summer :)
Thanks for reading x x


